BIFROST
Bifrost is an OpenStack project that deploys and operates Ironic using Ansible. It automates the process of installing and using Ironic to provision bare metal machines without needing the full OpenStack setup.
Some of the use cases are:
- You need to install ironic in standalone mode, without other OpenStack components.
- You're developing or testing Ironic (test environment)
- Uses Ansible so you can get repeatable automated deployments or to a known pool of hardware as a batch.
BIFROST INSTALLATION
The steps here are as per the official documentation for OpenStack Bifrost installation.
https://docs.openstack.org/bifrost/latest/install/index.html
Currently Bifrost is fully supported (tested and no known issues) for some OSs. As per the latest documentation : CentOS Stream 10, Ubuntu 22.04 “Jammy”, Ubuntu 24.04 “Noble” and Debian 12 “Bookworm”.
cat /etc/os-releaseI used this command to check my OS. Ubuntu 24.04 LTS “Noble”
From the Documentation, bitfrost can be installed in three ways.
- Via bifrost-cli command line tool - simplifies installations, built in defaults - best for beginners or first setup.
- By directly invoking ansible-playbook - more manual, more control
- By writing your own playbooks - for advanced users integrating Bifrost into other systems.
I will use the bitfrost-cli, since it is the official just works option.
REQUIRED PACKAGES
Bifrost needs Python 3.6 or newer and the git source code management tool. Python 3.12 is recommended.

I then installed git. with
sudo apt-get update
sudo apt-get install -y python3 git
Bifrost is then installed from git. Then cd into the bifrost directory.
git clone https://opendev.org/openstack/bifrost
cd bifrost
I am running Ubuntu on my computer as the OS. (not inside a virtual Machine).
So that means I have full virtualization support and would not run into virtualization issues mentioned as warnings in the documentation.
So here I have two options to either use:
./bifrost-cli install or ./bifrost-cli install - -testenv.
I researched the use cases.
./bifrost-cli install skips the virtual testing environment setup, best for when you plan to manage real physical hardware directly.
./bifrost-cli install - -testenv creates a self contained ironic + test VMs setup., best for when you want to test bifrost and recommended for learning/testing.
I then ran.
./bifrost-cli install --testenvThe script runs and later I am prompted with:
BECOME password:Ansible needs root privileges and its just Ansible asking for sudo password (your Ubuntu password).
SCRIPT RUN COMPLETE
I have run into one error
TASK [bifrost-ironic-install : Check that the provided interface is defined] ***
fatal: [127.0.0.1]: FAILED! => {"changed": false, "msg": "Network interface virbr0 is not known to Ansible. If you're testing Bifrost on virtual machines, do not forget to invoke \"bifrost-cli testenv\" or use the \"bifrost-create-vm-nodes\" role first. If you're using Bifrost on real bare metal, you have to provide the network interface via the \"network_interface\" variable or the --network-interface argument to \"bifrost-cli install\".\n"}
PLAY RECAP *********************************************************************
127.0.0.1 : ok=62 changed=32 unreachable=0 failed=1 skipped=48 rescued=0 ignored=0The issue is Network interface virbr0 is not known to Ansible.
Since running ./bifrost-cli install --testenv creates a virtual environment using libvirt (the virtualization backend)
Researching on the issue, virbr0 is the network interface which is the default libvirt virtual bridge used for test environments.
The solution might be just to make sure libvirt virtualization and networking tools are all installed.
sudo apt install -y libvirt-daemon-system libvirt-clients qemu-kvm bridge-utils virt-managerThen enable and start the libvirt networking
sudo systemctl enable --now libvirtd
sudo virsh net-autostart default
I then re-run
./bifrost-cli install --testenvThis time its successful.
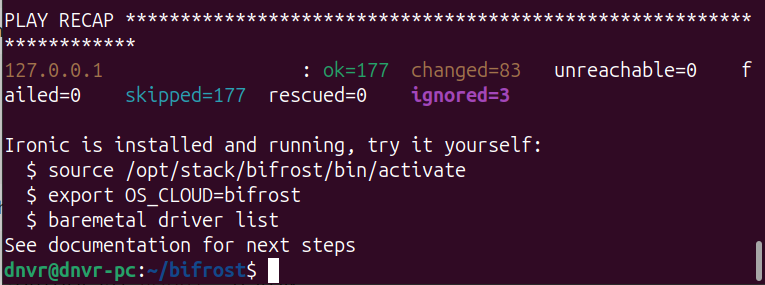
USING BIFROST
So we now have Bifrost installed. Ironic service running. An environment ready for managing virtual nodes.
The next step is to activate the virtual environment. This is like entering Bifrost’s own shell.
source /opt/stack/bifrost/bin/activateNext is to tell OpenStack CLI tools which cloud configuration to use.
export OS_CLOUD=bifrostAnd finally confirm Ironic is running and reachable by checking available drivers for provisioning machines.
baremetal driver list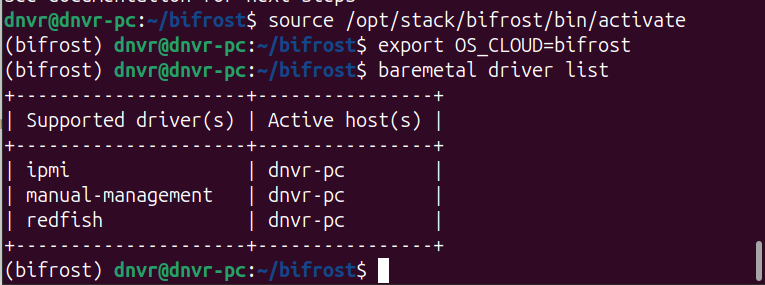
So we are set.